This is a product we love. But in the past, it has occasionally had minor hiccups and lack of features that we felt made it ready for prime time. And with each time switching back to our Gsuite, we felt a little closer every time we would try it out again. After much testing and putting it through the wringer again, Zoho Mail is ready for prime time.
With that being said, we did a full tutorial covering all the essentials of Zoho Mail, from settings to advanced features. Enjoy the video tutorial below, or if you’d like to read about it, continue past the video.
What is Zoho Mail?
The name says it all, Zoho Mail is Zoho’s email secure solution. Like Gmail or Outlook, you can manage all of your emails in one location. It also includes a handful of collaboration tools, making it more than just an Inbox.
Zoho Mail’s pricing is highly competitive against similar solutions out there, starting at $1 for Mail Lite or $4 for Mail Premium per user per month. However, an even better deal is that you can get the Zoho Workplace bundle which includes Zoho Mail and seven other Zoho applications, for the same price of $4 per user per month.
Pros
- Generous storage for the price
- Full suite of collaboration tools
- Robust Security Controls
Cons
- Microsoft and Gmail compatibility sometimes erratic
- Navigation can be confusing
- Lacking key integrations, i.e., Zoom
Admin Console
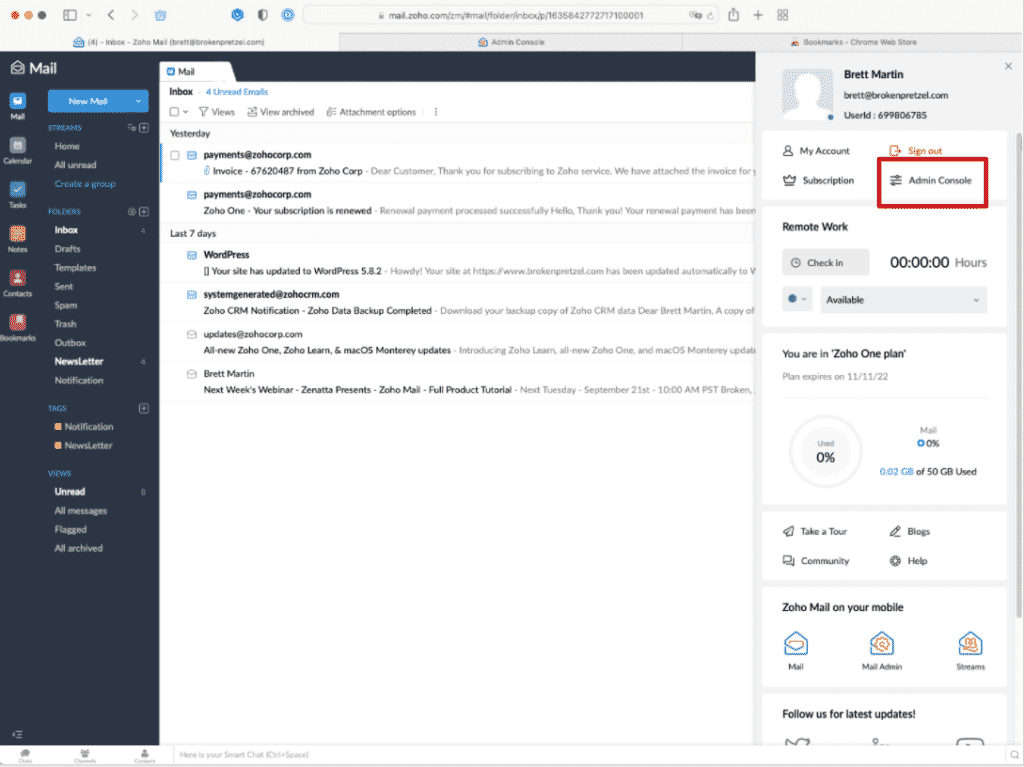
To get into your admin console, click on your user icon located at the top right of your page. Then click on Admin Console. Now that you are in your Admin Console, we will cover the three main items: Organization, Domain Setup, and Reports.
Organization
Here is where you will set up your organization settings.
- Profile – This includes your Company Name, Creation Date, Super Admin Name, Super Admin Email, and subscription information. This setting is also where you change the logo.
- Welcome Email Template – When you add a user, this is the email they will receive.
- Signature Template – Within Zoho Mail, you can build a template for all your users’ signatures. This keeps your organization unified and is a unique feature built-in with Mail.
- Display Name Format – First name, Last name or Last name, First name.
- Email Address Format – When adding a new user, what is the default format you want their user name to be. i.e., first.last@company.com.
- Customized Login – Customize the URL login here.
Domain Setup
Your domain gets added here. Once added, you can set up and manage your settings for your domain within this panel.
- General – This includes all the general information about your domain, all listed in one location.
- Email Configuration – This is where you configure your MX, SPF, DKIM, and DMARC settings. Watch this video tutorial for more details.
Reports
This section includes a handful of top downs that you probably want to see.
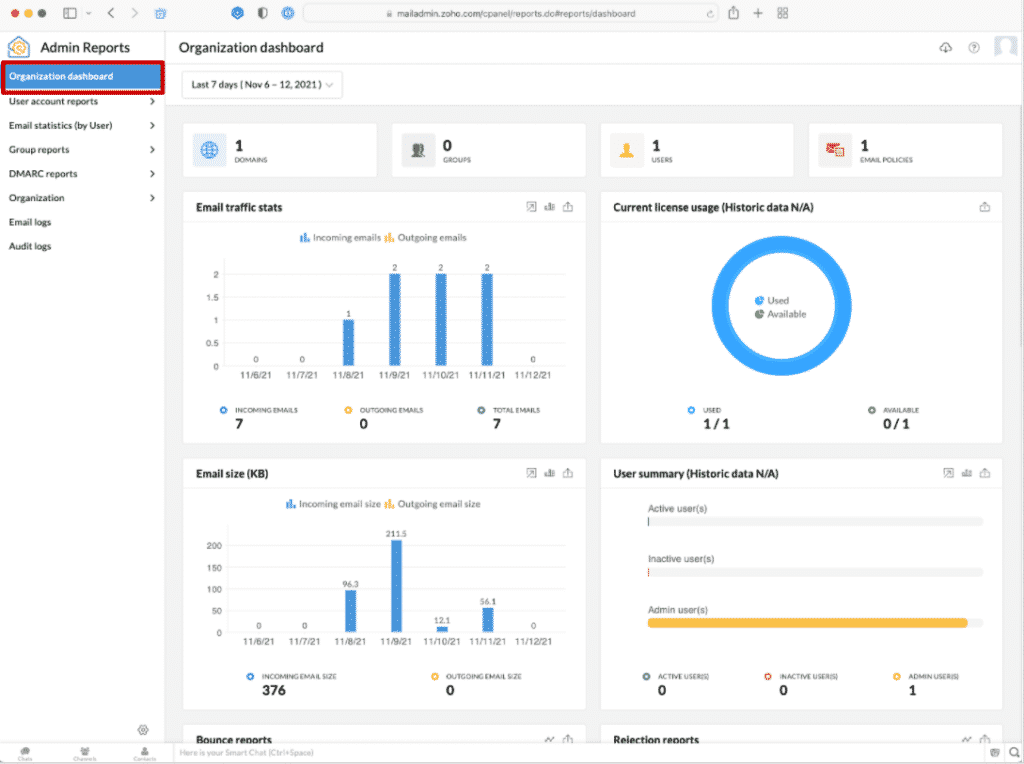
- User Account Reports
- User Summary – Includes a breakdown of different reports you would want to know about your internal user’s profile settings.
- Storage Details – Who is consuming storage?
- Protocol Status – Exchange, Imap, Pop, etc., can be seen here for each user.
- Protocol Access Details – Gives dates and times for the Protocol Status.
- Email Statistics (by User)
- Outgoing Traffic – How many emails are being sent out.
- Outgoing Traffic Size – The amount of data being used for outgoing traffic.
- Incoming Traffic – How many emails is a particular user receiving.
- Incoming Traffic Size – The amount of data being used for incoming emails.
- Spam Rate – See which users are receiving the most identified spam.
- Group reports
- The same as Email statistics by the user, except you can bunch users into groups to get a comprehensive report on that team.
- DMARC Reports
- This is where your mail admin would check to see if you have any authentication issues.
- Organization
- Here you can see the maximum amount of emails that can come in a minute and the maximum file size.
- Email / Audit logs
- These are a line item list of emails sent or any changes made to your Zoho Mail Setup.
Mail Client Walkthrough
Zoho Mail is going to look and feel pretty much the same as any other email client. There are, however, some slight differences and unique features that we’d like to cover instead.
The first unique feature is you can create Tags inside Zoho Mail. The difference being is you can tag something, but it won’t necessarily put it in a folder such as Gmail.
One unique feature exclusive to Zoho Mail and probably the most powerful is Streams. Rather than forwarding an email to someone within your organization, you can add a comment and mention someone. This feature is extremely nice. I think we all know how messy forward email chains can get, and Streams eliminate that.
Another great feature is Zoho Mail uses a tabular methodology. As such, you can easily have multiple items or email drafts open at a time and easily navigate between them.
Send Later is another feature included with Mail that allows you to send an email you compose out at a certain time. Reminders can also be set if you want to come back to an email later.
Tasks just got a major overhaul recently and can now also pull in your tasks from other various Zoho products such as CRM, Projects, Connect, People, etc. You can also access this directly via tasks.zoho.com.

User Settings
To access your user settings, click on the Coggle located on the upper right of the screen. You will see All, General, Mail, Groups, and Calendar at the top in this tab. Whichever you click on will bring only those settings up. In this tutorial, we cover Mail.
Mail Accounts
The layout for mail accounts is extremely nice in Zoho Mail. Your Add POP3 Account, Add IMAP Account, POP Access, Email Forwarding, and POP Fetch Settings are all on one page. To Add an Account is also located at the top of this page (fast forward to 28:43 for this process).
For POP, if you want to allow POP Access, you need to turn it on. Then you can include your spam filters and auto-delete emails (we never recommend turning on auto-delete). Right below this, you will see your POP3 configuration if you want to switch to a different platform.
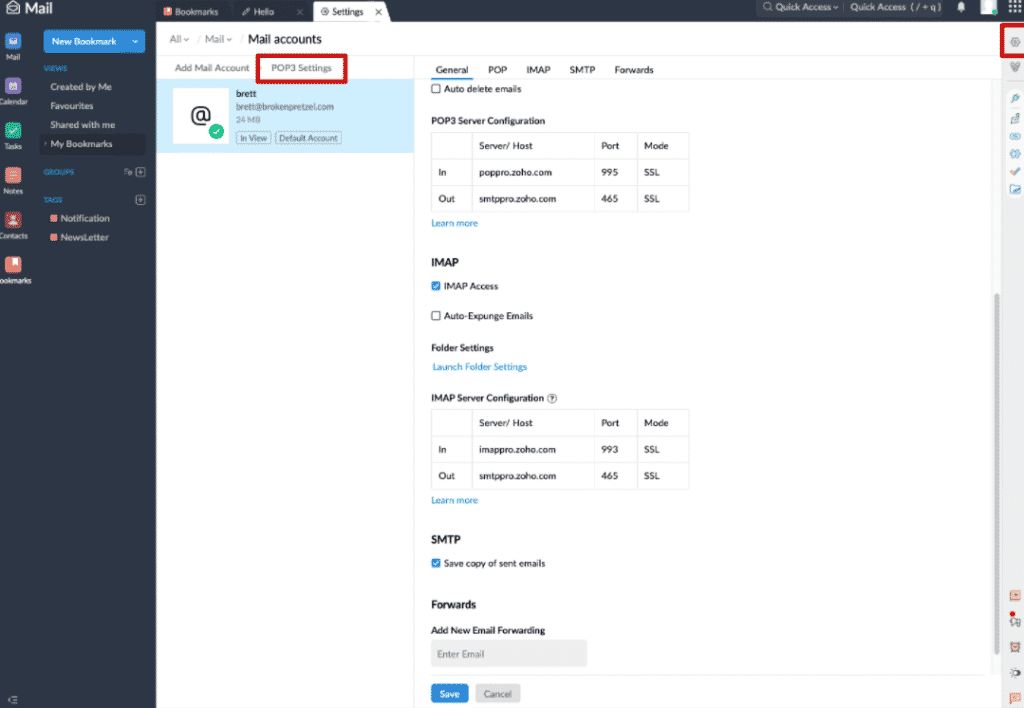
IMAP settings are similar to POP just mentioned, but with Folders, you can choose which you would like to view and receive notifications.
Email Forwarding if you want to assign an email that anything that comes into an email address forwards it to, you can do so here. A better way, though, would be to set up filters on the back-end.
The last feature in Mail Accounts is POP Fetch Settings. Here you can set how often to check for mail and how many emails can come in per minute.
Signatures
In the settings panel at the bottom resides Signatures. Here you can assign signatures to each of the different emails you have. To see the process of creating a new signature from scratch, fast forward to 32:20 of the video tutorial.
Compose
Composition settings are great, the amount of detail on these is fantastic.
- Open Compose in – This allows you to choose New Window, New Tab, or Inline.
- Default Encoding – In case you don’t want to use UTF-8, you can choose another.
- Editor Mode – Rich Text or Plain Text for new emails or replies.
- For replies, send using – Choose if you want replies using your default email or another.
- Preferred Text Direction – Most of us use left to right, but there are plenty of other languages that you may want to switch to right to left.
- Additional Settings – Include Font, Font Size, Font Color, Delays, Automatically Add Contacts, and much more!
Filters
As discussed earlier on spam filters and email forwarding, Filters is where you would want to set up the various conditions and actions you want to take place for emails.
One thing to note is that out of the box, Zoho includes filters for notifications and emails. By default, they are turned off, but they will turn on if you click Smart Filters enabled.
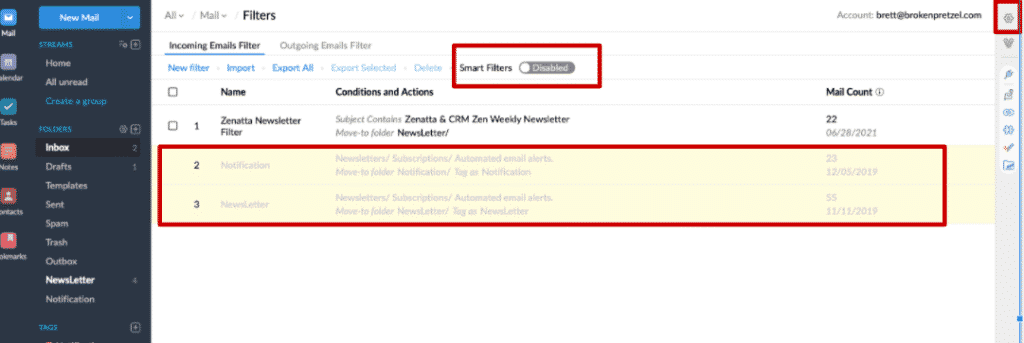
If you are used to setting up filters in other Mail clients, you will not find this part difficult. If you are new to this, skip ahead to 36:00 of the tutorial for a step-by-step walkthrough.
Widgets
If you use other Zoho applications, Widgets are amazing. On the right bar, there is a tiny icon that looks like a plug which, if you click open, will show you all the different application widgets you have installed. This is where you will pin any Zoho applications you use to your bar.
You also have widgets for non-Zoho apps as well.
Each of these widgets gives you ways to interact with the various Zoho applications you might use without ever having to leave the Mail client. One less click is always a plus!
Need Help Making Mail Work For You?
If you need additional help or have further questions that we didn’t cover in this review, don’t hesitate to reach out to us. Check out our additional Zoho Mail resources or schedule a free consultation.


