Just because you’ve embraced Zoho doesn’t mean you have to relinquish your Google Workspace. While Zoho offers similar applications that are undoubtedly proficient, Zoho understands the significance of Google Workspace to many enterprises. As a result, they’ve developed integrations that function seamlessly within Zoho CRM.
In this guide, we will delve into the process of integrating Gmail, Google Drive, Google Contacts, and Google Calendar with Zoho CRM. For those who prefer visual learning, we’ve incorporated a comprehensive video tutorial for each integration below.
Integrating Gmail with Zoho CRM
Let’s start by looking at the step-by-step process of integrating Gmail.

- Initiating the Process:
- Open Zoho CRM.
- Click on the setup icon (cogwheel) in the top right corner.
- Navigate to the “Email” tab.
- Under “Email Configuration”, you will find an option to configure your connected inbox.
- Connecting to Gmail:
- Click “Get Started”.
- You’ll see various email platform options. Select “Gmail”.
- Among the methods of integration available (IMAP, POP, and API), choose IMAP for optimal synchronization and performance.
- Click “Configure”.
- Authentication and Permissions:
- A new window will open, prompting you to sign in to your Google account.
- Upon entering your credentials, you may need to allow Zoho CRM to access and manage your email.
- Setting Email Preferences:
- Once integrated, decide how you want to share your emails within Zoho CRM:
- Private: Your emails remain visible only to you.
- Public: Everyone in the CRM can see your emails.
- Custom: Set specific sharing rules on a record-by-record basis.
- It’s usually recommended to set emails to public for greater transparency within teams. However, always be cautious about sharing sensitive or confidential information.
- Once integrated, decide how you want to share your emails within Zoho CRM:
- Excluding Internal Communication:
- To ensure internal emails don’t clutter your CRM, use the “Exclude Domains” option. This is crucial to maintain the CRM’s focus on external, client-based communications.
- Insert your company’s domain (e.g., “@yourcompany.com”) to exclude any internal correspondence.
- Reviewing Settings and Finishing Integration:
- Ensure the server details, which are typically auto-filled, are correct.
- The option to add multiple ‘from’ addresses is available if you manage various emails.
- Once satisfied with your settings, click “Update”.
- Test and Verify:
- After setting up, send an email from your Gmail to a contact in Zoho CRM. Check if the email reflects in the CRM under the respective contact’s email history.
Notable Benefits of Direct Emailing from CRM:
- Sending emails directly from Zoho CRM allows you to track if the recipient opens or clicks on any links within the email. This is valuable feedback, especially for sales and marketing campaigns.
- While back-and-forth communication can continue natively in Gmail, initiating contact from within the CRM offers more comprehensive data on recipient engagement.
Integrating Google Calendar with Zoho CRM

So, slightly different than configuring Gmail, to start the Calendar integration, we will want to head over to the Marketplace.
- Accessing Marketplace Settings:
- Open Zoho CRM settings by clicking the cogwheel icon.
- Navigate to “Marketplace” found on the bottom right.
- Select “Google”.
- Choosing the Integration:
- You’ll see options for both “Calendar” and “Contacts”. Select “Calendar”.
- Authentication and Permissions:
- Click “Sign In” and select your Google account.
- If prompted, provide your Google password.
- Grant necessary permissions for the integration.
- Setting Sync Preferences:
- Decide on the synchronization direction:
- Two-way Sync: Keeps both Zoho and Google Calendar updated reciprocally.
- From Zoho to Google: Only updates made in Zoho reflect in Google Calendar.
- From Google to Zoho: Only updates made in Google Calendar reflect in Zoho.
- For this guide, select “Two-way Sync” and click “Save”.
- Decide on the synchronization direction:
- Testing the Integration from Google Calendar:
- Schedule a meeting in Google Calendar with a contact using their email.
- Give the meeting an identifiable name (e.g., “Example Meeting”).
- Once saved, wait a few moments. The meeting should now appear in the contact’s record in Zoho CRM.
- Testing the Integration from Zoho CRM:
- Within a contact’s record in Zoho CRM, navigate to “Open Activities”.
- Add a new meeting (e.g., “CRM Booked Meeting”).
- Choose a date and time and ensure you add the contact as a participant.
- Once saved, the meeting will appear in both Zoho CRM’s “Invited Meetings” and “Open Meetings”.
- Check Google Calendar. The scheduled meeting should now be visible on the selected date and time.
Notable Points:
- There can be a slight delay when events are booked from Google Calendar to Zoho CRM. It’s always good to be patient and give the systems a few moments to synchronize.
- The integration links events to leads and contact records based on matching email addresses, making the organization and tracking of client interactions seamless and efficient.
Integrating Google Contacts with Zoho CRM
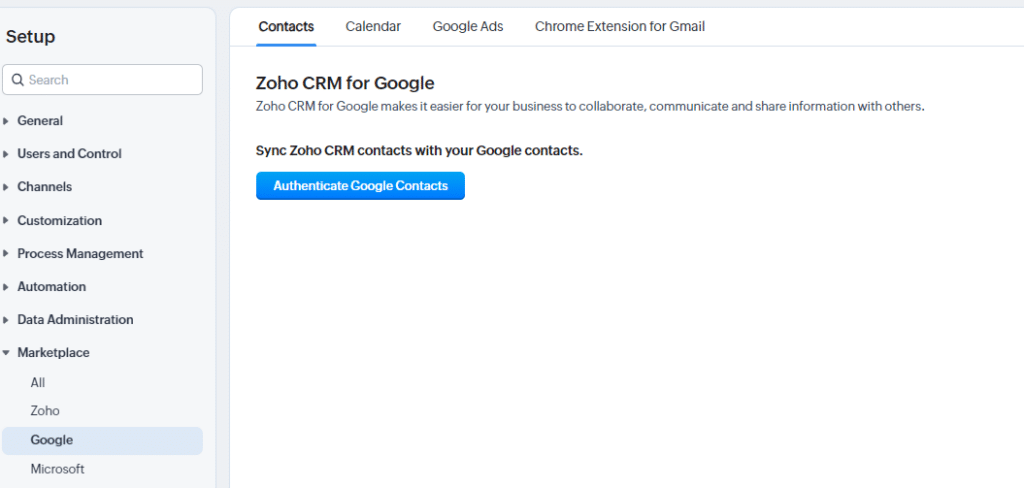
Like Calendar, we will want to head back to the Marketplace.
- Accessing the Google Integration Settings:
- Navigate to the “Setup” tab in Zoho CRM.
- Enter the “Google” section within the “Marketplace”.
- Authentication and Permissions:
- Click to authenticate your contacts.
- Sign in to your Google account and allow necessary permissions for the integration.
- Configuring Sync Preferences:
- Select Contacts for Syncing: Determine which contacts from Zoho CRM you want to synchronize with Google. You can choose to sync all contacts or specific ones.
- Synchronization Direction:
- Two-way Sync: Both Zoho CRM and Google Contacts are updated reciprocally.
- One-way Sync (from Zoho to Google): Only updates made in Zoho CRM reflect in Google Contacts.
- The recommendation here is a one-way sync from Zoho CRM to Google Contacts. This ensures you don’t flood your CRM with less important contacts that might exist in Google.
- Field Mapping:
- Decide which fields in Zoho CRM should map to which fields in Google Contacts (e.g., company name, phone numbers, Skype ID, etc.).
- Configure these mappings as per your preferences.
- Saving and Initiating Sync:
- Click “Save”.
- The synchronization process will begin and may take some time to complete.
Benefits of Syncing:
- Enhanced Email Experience: When you’re in Google, having the contacts synced makes sending emails easier. You can begin typing a contact’s name, and Google will automatically suggest their email address.
- Autofill Advantage: Google’s autofill feature can recognize and suggest the full name rather than just the email address, enhancing the email drafting experience.
- Better Recognition: Even if you operate outside the CRM, the synchronized contacts allow you to recognize who the person is within your system.
Recommendations:
- Opting for a one-way sync (from Zoho CRM to Google Contacts) is advised. This ensures only the essential CRM contacts populate your Google Contacts, preventing clutter and maintaining a clear distinction between professional and casual contacts.
Integrating Google Drive with Zoho CRM
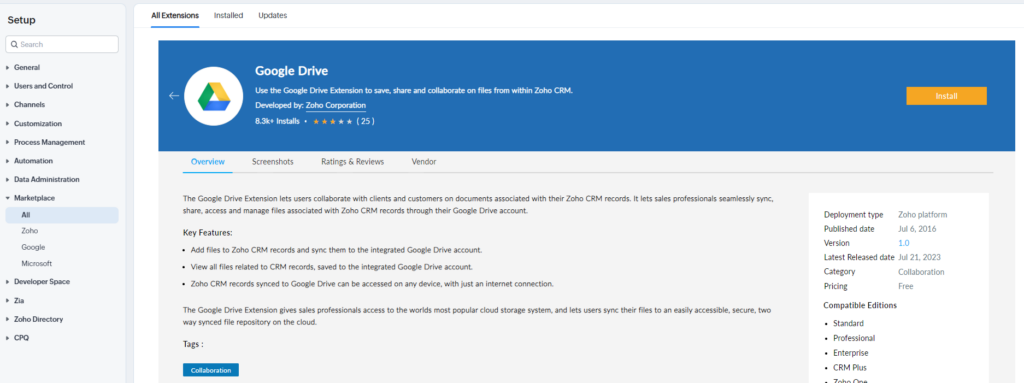
This last integration with Google Drive is located in a different location and is built by Zoho. Let’s look at how to set it up.
- Accessing the Google Drive Integration Settings:
- Navigate to the “Setup” tab in Zoho CRM.
- Go to “Marketplace” and then select “All”.
- Use the search bar to find the “Google Drive” plugin.
- Install the Google Drive Plugin:
- Opt for the plugin built by Zoho for the best compatibility.
- Click to install the plugin and agree/opt-in when prompted.
- Install for all users.
- OAuth Authentication (Handshake):
- A pop-up will appear, prompting OAuth authentication.
- Click “Allow” to grant necessary permissions.
- Integration Settings Configuration:
- Once redirected to settings, configure as follows:
- Determine where data will land in Google Drive. If it’s your personal drive, input “0”; if it’s a team drive, input “1”.
- Identify the Google root folder ID by navigating to the intended Google Drive folder, and copy the string at the end of the URL.
- Select the Zoho CRM modules you wish to integrate with Google Drive (e.g., Leads, Accounts, Contacts, Deals).
- For deals, choose if they should be nested within the corresponding account folder for organization.
- Customize the folder naming convention if desired.
- Once redirected to settings, configure as follows:
- Using the Integration:
- Navigate to any record, like an account. You’ll notice a new “Google Drive files” related list on the left.
- For existing records, folders won’t be automatically created. Use the “Add file to Google Drive” button to initiate this.
- On clicking this button, corresponding folders will be created in Google Drive.
- Files can be added to these folders directly from Zoho CRM or from Google Drive. Both platforms will sync and display the files accordingly.
Benefits of Google Drive-Zoho CRM Integration:
- Unified Storage: Store and access your files related to CRM records without switching between platforms.
- Economical: The files reside in Google Drive, ensuring you don’t consume Zoho CRM storage.
- Bidirectional Sync: Adding files from either Zoho CRM or Google Drive ensures they are visible and accessible on both platforms.
Zoho Alternatives
Remember, you don’t have to use all of these integrations. Between ourselves and clients, we’ve seen virtually all combinations possible on what applications organizations have chosen to integrate and switch to Zoho. Check out our resources on Zoho Mail, Zoho Calendar, and WorkDrive to see if any of them would be a better fit for you! And, of course, if you need help, our team is always here for you.


