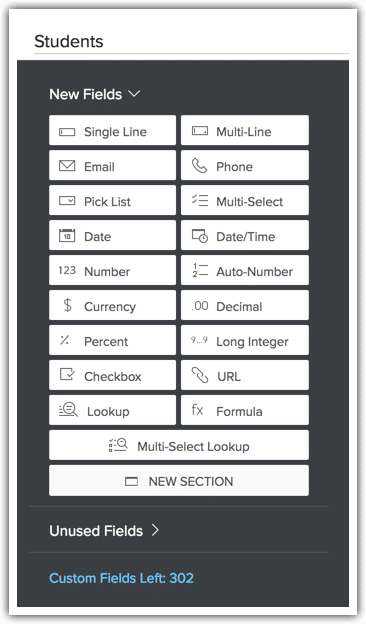
You can expand your records’ capability by creating custom fields in Zoho CRM. With the addition of custom fields, you can track any data you’d like, whether or not Zoho thought to include a spot for it. Also, you can execute advanced functionality, like formula calculations, but for now, we’ll focus on the process behind identifying the forms you need and adding them to your records.
Creating the Right Fields
What fields would be most useful to your organization? This will most often reveal itself in practice. As you and your employees work with the data in the CRM, you will likely find that there are goals you wish to accomplish that aren’t easily achieved with the standard CRM fields. You can create Custom fields to solve these problems. Still, you should follow a few guidelines to avoid creating fields that quickly become irrelevant or require arduous manual maintenance to remain relevant.
Checklist for Creating Useful Custom Fields
- What data will live in this field?
- What format is this data in?
- Is any input checking or authentication necessary?
- How will your team use the data? Filtering, reporting, or searching?
- What data module will the field apply to?
- Will this data be controlled by automated processes or humans?
- Does this field fulfill a frequent need, or is it a rare convenience? Don’t create custom fields to solve a one-off problem. That’s not what they’re best at, and you’ll only clutter your database.
Creating Custom Fields

To create new custom fields or edit existing fields, make sure you log into a Zoho CRM account with administrative privileges.
- Go to Setup > Customization > Modules and Fields.
- Click the appropriate module. This will open the layout editor, which is where you’ll create custom fields.
- Using the tray of field presets on the left, drag and drop the desired field type(s) into the layout on the right.
- Give the field a name and set any field properties as necessary.
- Click Save Layout to commit your changes.
For more information about creating powerful custom fields in Zoho CRM, check out Zoho’s full tutorial on custom fields.
Avoiding Duplication
Some fields will take data that should be unique to that individual. Email addresses, for example, should associate with one record and one record only. Two records with the same email address likely indicate that two records should not exist. So, to help you and your team avoid duplication, you can use Zoho CRM’s existing tools to avoid duplicating data in specific custom fields.

- Go to Setup > Customization > Modules and Fields.
- Click the appropriate module. This will open the layout editor, which is where you’ll create custom fields.
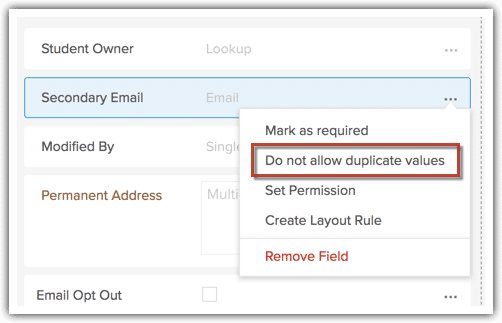
- Click the Settings icon on the field that you wish to mark as unique.
- Select the Do not allow duplicate values option from the Settings drop-down list.
To avoid duplication, set the field as a unique field. A unique field is a field in a record whose value must be unique. To set a field as unique, click the cog next to it and choose Do not allow duplicate values. This will prohibit the saving of a record with duplicate values in a unique field.
Basic User Input Rules
Users are, in general, a sloppy bunch. Without any policing, your CRM will quickly devolve to the point of near uselessness. Clean data requires either a rigorous training process or a self-policing database. The second option is easier, and it doesn’t rely on imperfect humans remembering to follow a series of detailed steps.
The easiest way to restrict input data is with careful use of Zoho CRM’s pre-built field types, found in the field tray. These fields each take data in a certain format or of a certain kind, much like how an Excel spreadsheet cell can reformat numbers to match a pre-defined formatting rule.

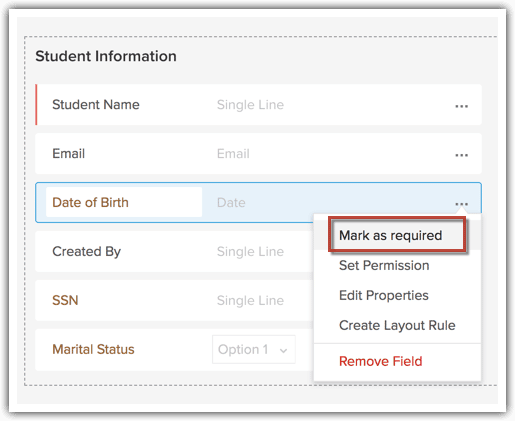
Many fields can also be set as required, which means they must be filled in with valid data before the record can be saved. You can set fields as dependent, dynamically altering which fields are required based on the user’s partial completion of the record.
There are dozens of pre-defined fields, and each has its own specific rules. You can learn more about the field types available in Zoho CRM’s help documentation.
Powerful Data Validation Rules for CRM Fields

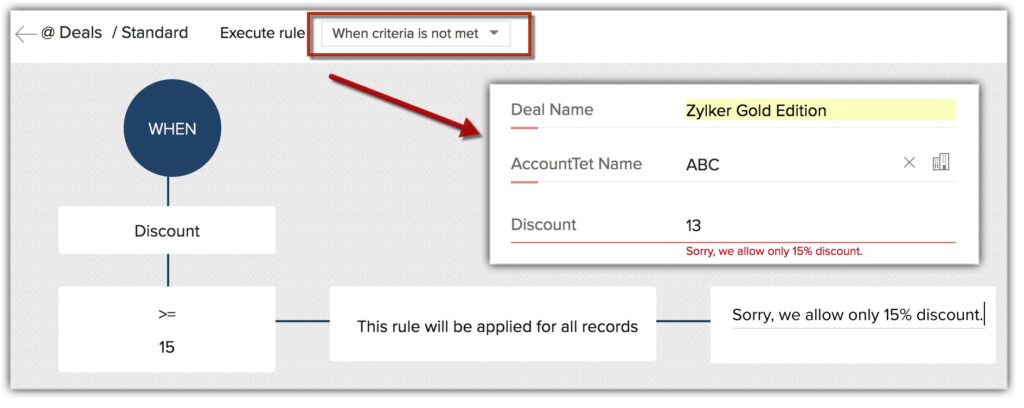
Data can also be validated against arbitrary requirements with Zoho CRM’s workflow-style verification tools.
- Navigate to Setup > Customization > Modules and Fields
- Choose the appropriate module
- Click Validation Rules
- Click the blue button labeled Create Validation Rule
- Set up your validation requirements using the workflow-style tools.
Zoho CRM’s validation tools and detailed and robust, but even a novice can use the visual layout tools to build a basic validation rule. To create more complex and powerful rules, start with Zoho’s knowledge base article on validation rules.


