How much time do you spend emailing back and forth about scheduling? Like trying to spell a word over a crackly phone connection, plenty gets lost in communication. Don’t despair, there is a better way! Use Zoho Bookings and let your clients schedule their own appointments through a link in your email signature. You’ll be notified when clients schedule appointments, and you’ll always have control over what time you’re free and available.
If you manage a busy business in the service industry, Zoho Bookings can help you manage your time, reduce no-shows, and stay on top of your busy schedule.
Integrate Zoho Bookings with Zoho CRM
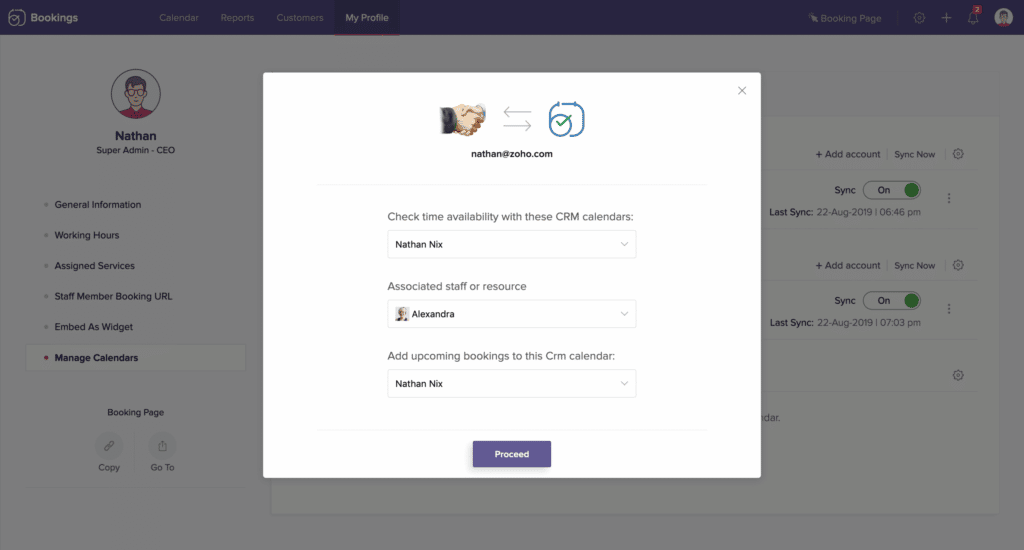
Zoho Bookings can integrate with the calendar in Zoho CRM, Google Calendar, or Zoho Calendar.
- Click the Manage Business icon in the top panel of Zoho Bookings.
- Click on the Calendar tab in the sidebar to the left.
- Hover over Zoho CRM Calendar and click Authorize to establish the calendar connection.
- Set your calendar preferences:
- Select the calendar or calendars to be used for availability
- Set the staff member associated with that calendar in Bookings.
- Select a calendar to which Zoho Bookings appointments will be added.
- Click Proceed.
Using Zoho Bookings Plugin To Schedule Appointments
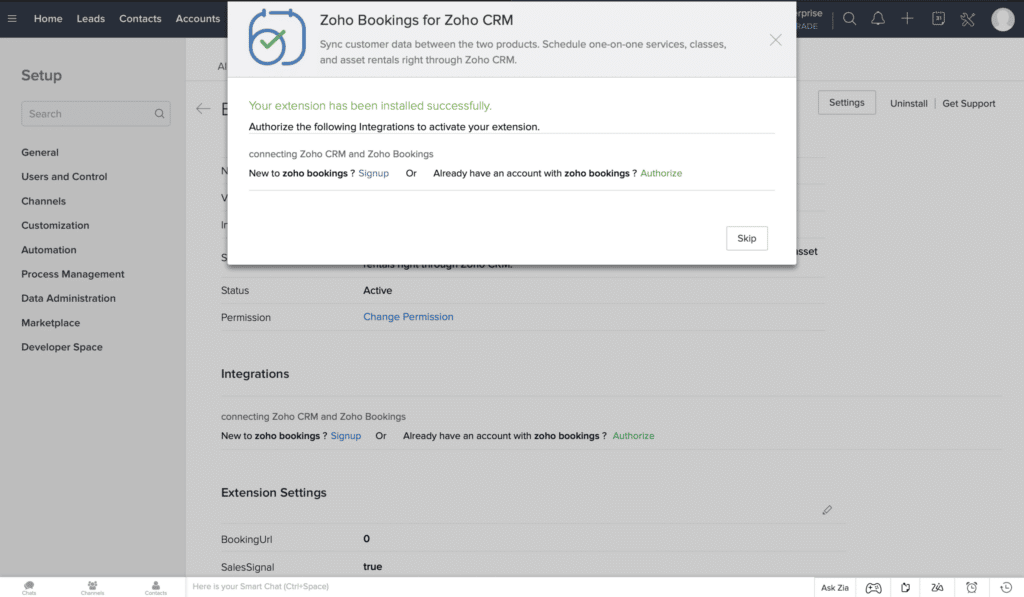
With the Zoho Bookings plugin, you can also connect Zoho Bookings appointments to Leads and Contacts in Zoho CRM. This plugin also syncs Zoho Bookings’ calendar with Zoho CRM’s calendar, so there’s no need for separate calendar syncs.
- Navigate to the Zoho Bookings plugin webpage.
- Click Install. Remember, you must be a Zoho CRM administrator to install plugins.
- Agree to the plugin’s terms and conditions.
- Click Continue to Install.
- Select the correct account. If you’re not sure, Install For All Users will provide universal access to the service.
- Click Confirm to complete the installation.
- Click Authorize to connect your Zoho Bookings account to Zoho CRM. You may need to log into your Zoho Bookings account.
With this plugin, you can schedule appointments with a client directly from their Contact or Lead page in Zoho CRM.
Managing Your Business in Zoho Bookings
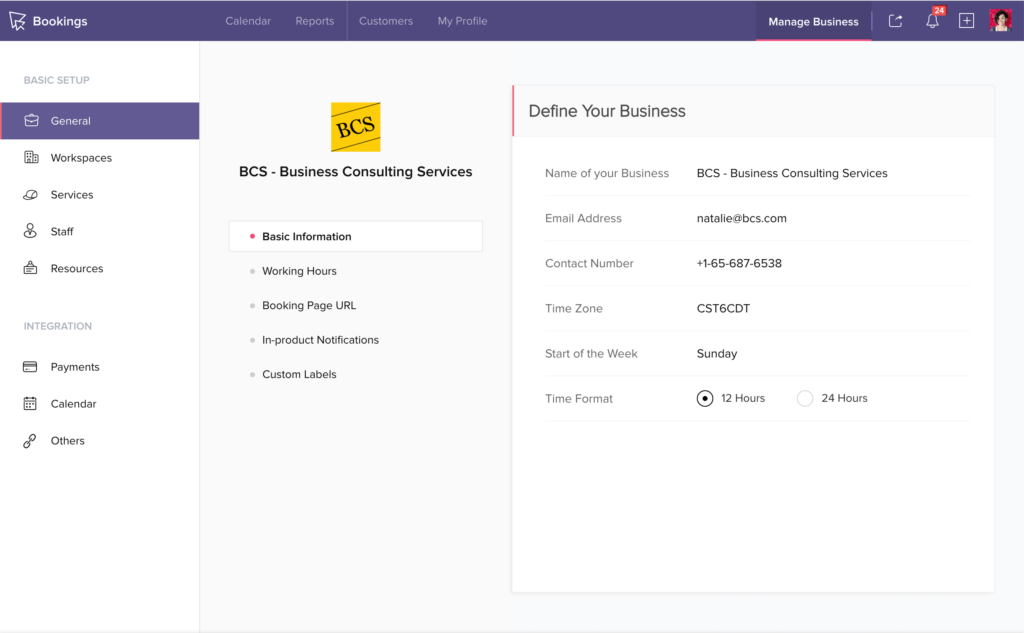
Under the Manage Business tab in Zoho Bookings, you’ll find tools to control your appointment booking page and options for availability and services.
Booking Policies: Click Policies & Preferences and customize any of the options below.
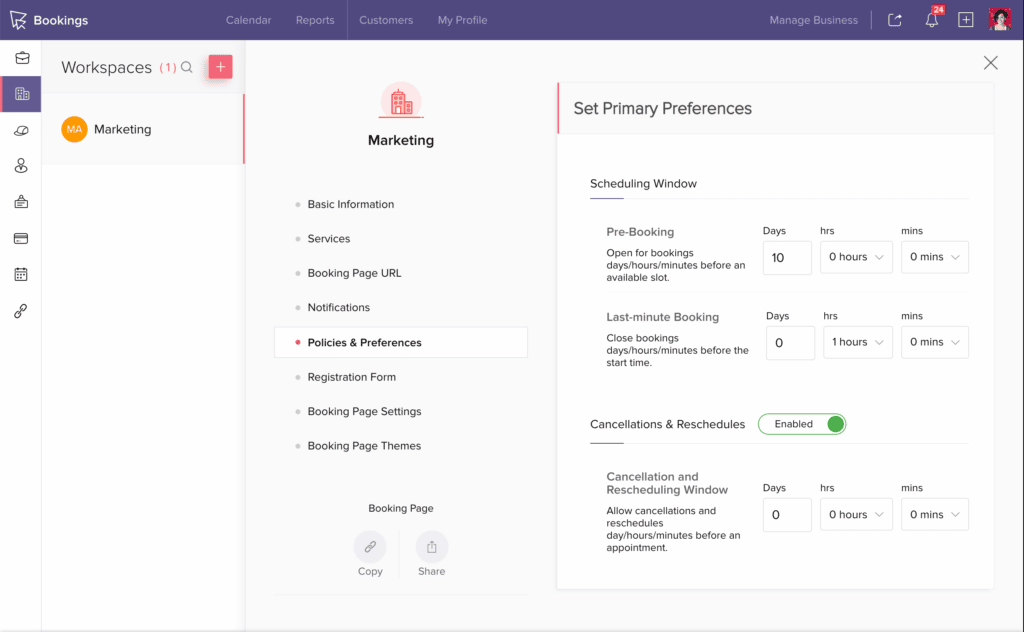
- Scheduling Interval: the time between two appointments. Use this to include travel time or prep time between sessions.
- Invoice Preferences: set options for invoicing services.
- Scheduling Window: set how far in advance clients can book appointments, and how close to the date of service an appointment can be booked. Those intervals establish the scheduling window.
- Cancellations & Reschedules: define your cancellation and rescheduling policy, if enabled.
Workspaces: Workspaces are where your staff performs services, including spaces like studios, service bays, offices, or meeting rooms. Each workspace has its own booking policies, allowing you to associate staff, resources, and services with the workspace. To set up a workspace, navigate to Manage Business, click Workspaces, then click the + icon in the top right to create a new workspace.
Services: Services are the services your clients can schedule for. Service includes a duration, price, workspace, and more. To establish Services, navigate to Manage Business, click Services, then click the + icon in the top right to create a new service.
Staff: Staff information is used to connect employees to the services they can provide, set their working hours, and enforce their scheduling needs. To set up staff, navigate to Manage Business, click Staff, then click the + icon in the top right to add staff.
Resources: Set what resources are available and required for various services, such as presentation equipment, vehicles, and office technology. To set up resources, navigate to Manage Business, click Resources, then click the + icon in the top right to add a new resource.
Sharing Zoho Bookings Appointment Booking Links
There are two types of appointment request links in Zoho Bookings: business appointments, which are booked with anyone available at the business, and individual appointments, which are booked with a specific employee. For example, a salon might offer business appointments for first-time clients but allow returning clients to create individual appointments with their favorite stylist. Find and share your booking links below.
Find Your Business’ Booking Link
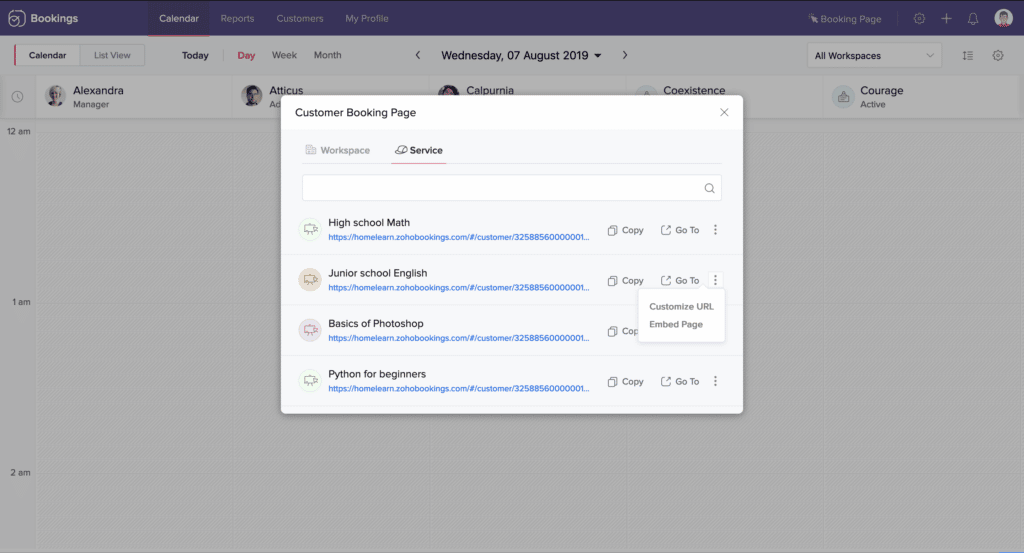
- To find the link for business appointments, click on the Booking Page link in the top menu bar.
- Select the correct workspace or service from the list if you have several.
- Click Copy to copy the link to your booking page.
- Paste the link into your email signature, or keep it handy for specific messages. You can also incorporate the link into email templates with Zoho Mail.
Use the More icon to customize your booking page URL or to get an embed code for the page. The embed code will show the appointment webpage within a box contained on another webpage, which is especially useful for integrating appointment scheduling into a larger website.
Find Your Individual Appointment Link
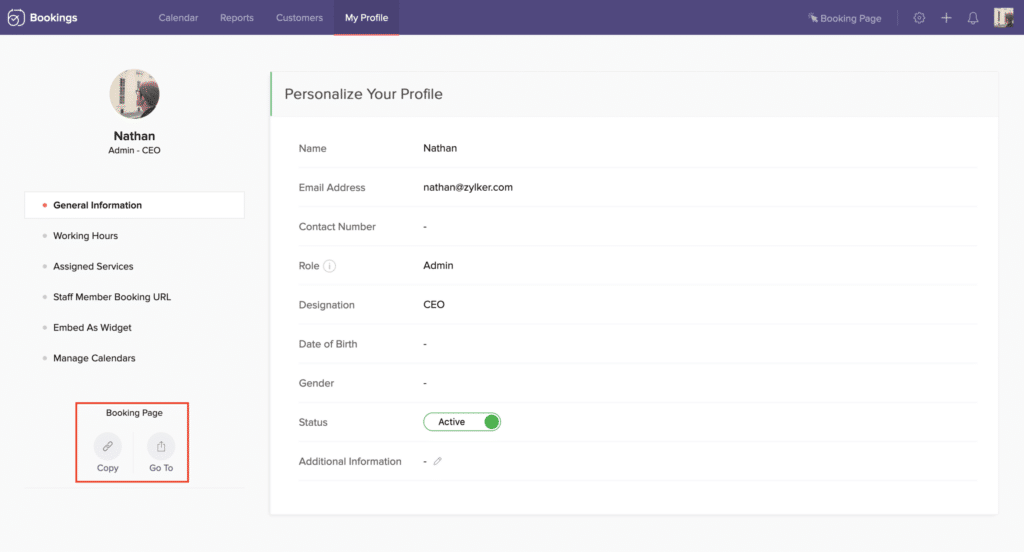
- Click My Profile in the Zoho Bookings menu.
- Select Copy or Go To under Booking Page, found in the sidebar on the left.
Additional Appointment Scheduling Options
If you don’t use Zoho Calendar, you can still get an appointment scheduling link in your email. A third-party service can also provide online appointment services, like Calendly, Appointy, Setmore, or even Facebook. These will work with any calendar service and are easy to set up, with price points ranging from free to a substantial monthly fee. If you’re already working with Zoho CRM, then Zoho Bookings is by far your best option for complete integration into your existing workflows.


